Hello! My name is Dmytro and I am a Delivery Director at Levi9. I’ve always been fascinated by astronomy and wanted to have a handy gadget that would show how the planets of the solar system move in real-time. That’s how my pocket planetarium based on the Raspberry Pi Pico microcontroller was born, displaying the current position of the planets in our solar system. In this article, I’d like to share the principle of its operation and technical specifics in more detail, as well as prove two things with my own example:
- The Raspberry Pi Pico can display useful, colorful graphics with a powerful FPS.
- The code written in Python can run well on microcontrollers.
What the device is
For centuries, astronomers have used orbits to model the movement of planets around the Sun. In fact, mechanical models of the solar system date back to around 150 BC, but they got their name when the English nobleman Charles Boyle, the fourth Earl of Orrery, commissioned his own planetarium in 1713, designed by clockmakers George Graham and Thomas Thompion.
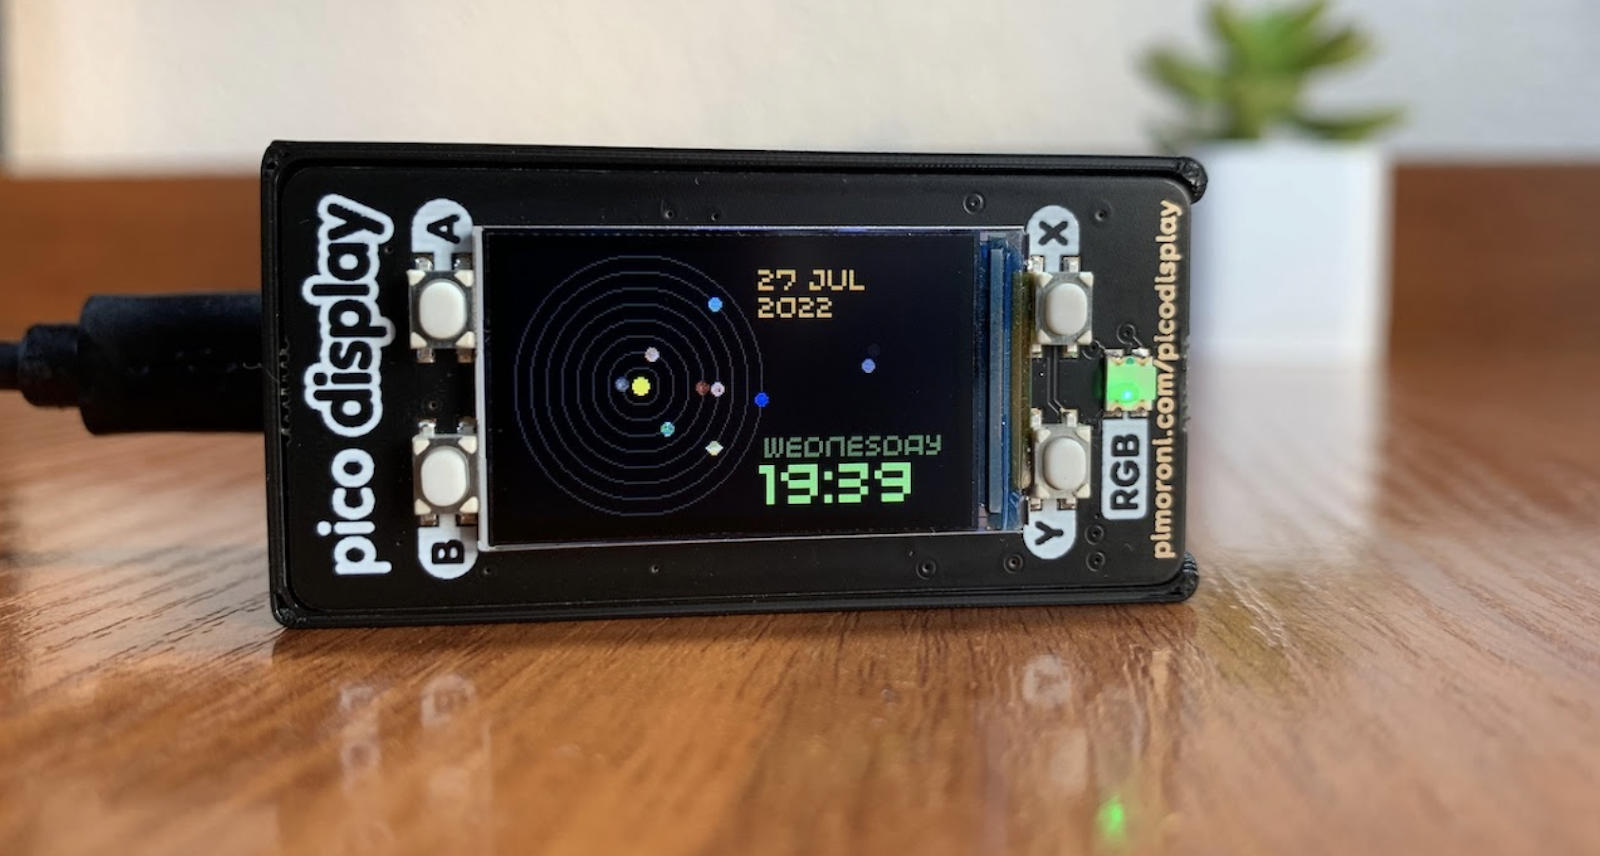
My device can display data about the solar system in real time—it shows eight planets moving along a certain path. It works both with and without the RTC module, if you use the Raspberry Pi Pico W in your development. Moreover, the device can also work as a regular clock.
If you look closely, you can see the previous location of Pluto on the right side of the screen. At first glance, the planet just moves along a predetermined trajectory without reference to other processes in the app, but this is not the case. Thanks to the “jumps”, Pluto counts down the seconds, and its movement is dictated by a clear algorithm. Thus, the more seconds are left until the next minute, the higher Pluto jumps. And just before the minutes change on the dial, the planet rolls down the screen, reaching the “ground”.
The technical side of the issue
I chose a Raspberry Pi Pico to implement this project. It’s a low-cost board with a powerful microcontroller. It’s a small computer with a small amount of memory and limited ability to connect additional gadgets like a keyboard or monitor. In general, microcontrollers are an amazing thing. Just imagine that such a tiny object can execute your commands and do almost anything with extremely low power consumption.
When I learned about the RP2040 microcontroller and checked its characteristics, I realized that I had to try it. This board is the first in the Raspberry Pi Foundation’s RP2040-based line, which they developed themselves. It was interesting to test it—particularly, how efficient it is compared to older “players”. In addition, the board is quite powerful and has a rather interesting approach to implementing its own PIO protocols (not used in this project).
Since all microcontrollers have a limited amount of memory and resources, C is mostly used to program them. Yes, it is more low-level and allows you to better control memory usage and use the microcontroller’s computing cycles. This often helps me in developing and writing relevant programs. In this case, I wanted to use MicroPython instead of C to program the microcontroller in this project. MicroPython is a limited version of Python for microcontrollers that makes programming faster, easier, and even more cross-platform. But an important note: it doesn’t allow memory control and uses many more resources for the interpreter.
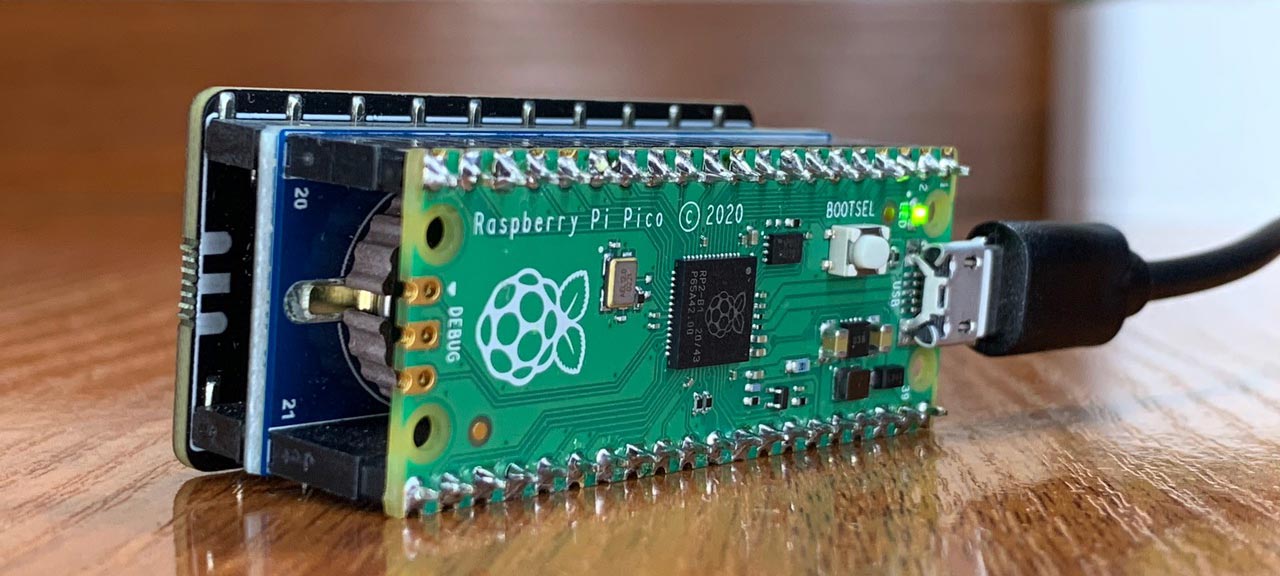
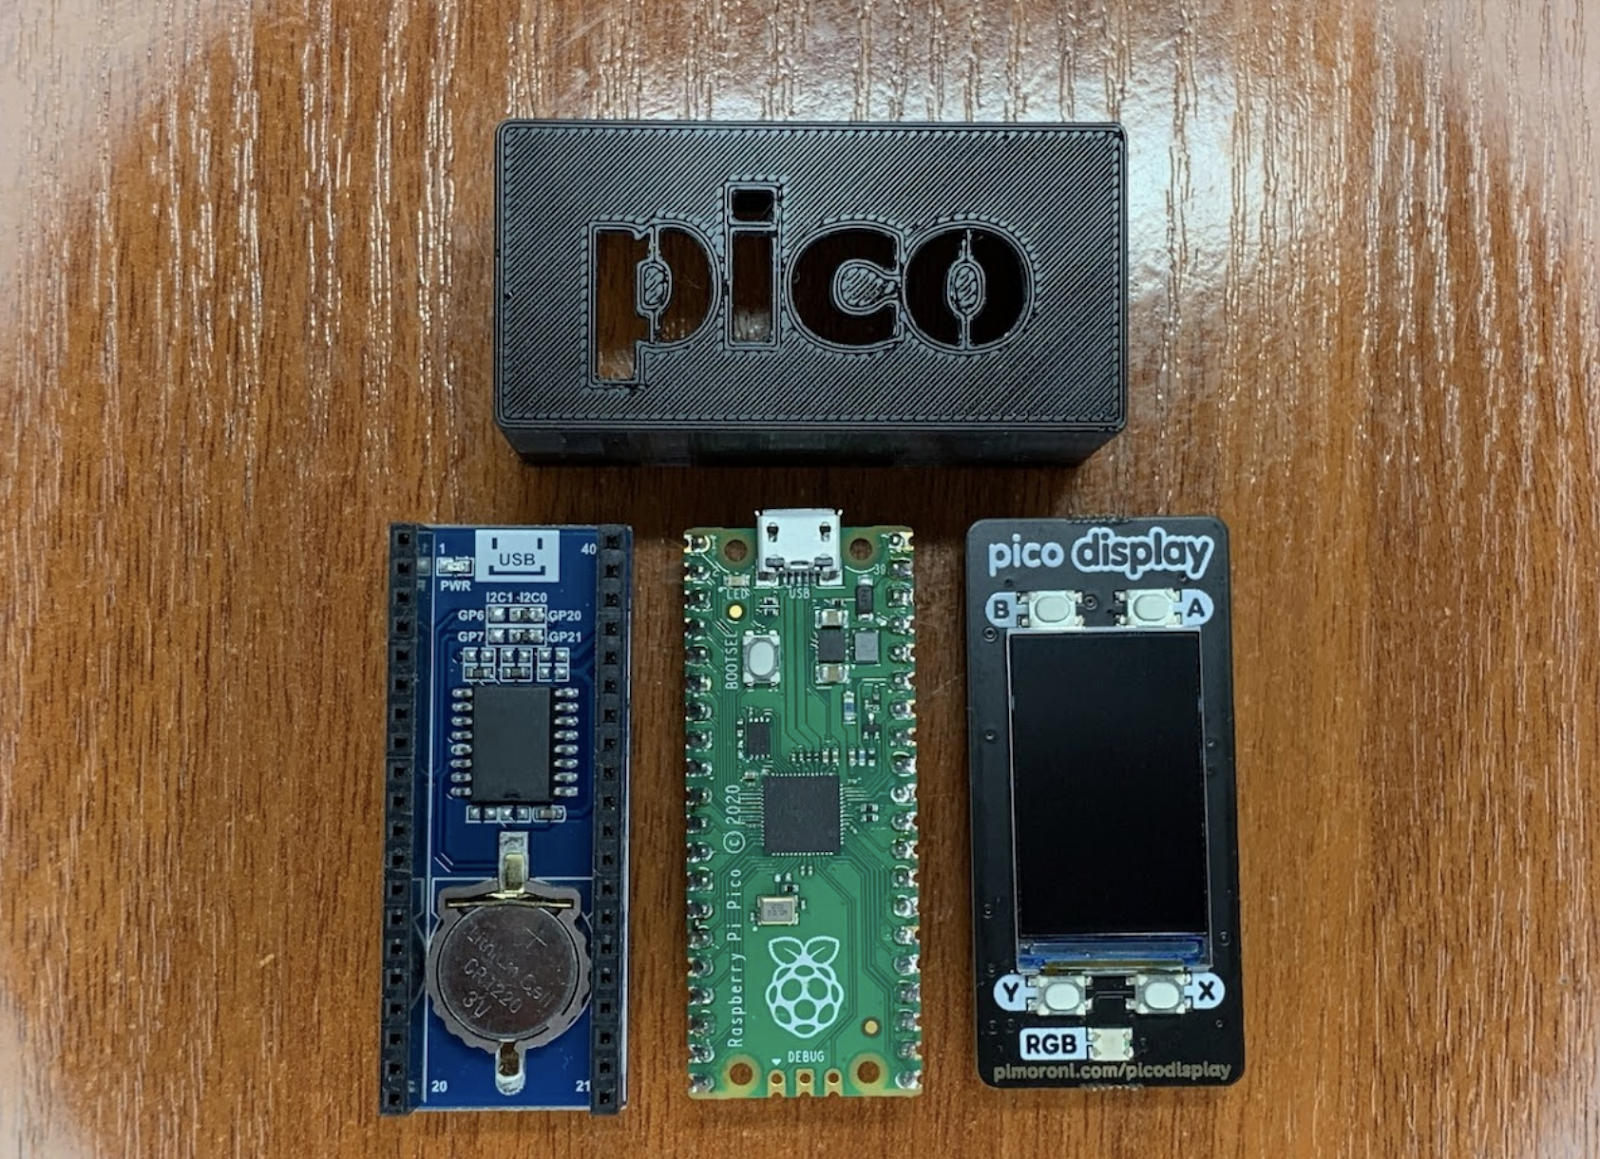
In addition to Pico, the project requires the RTC module, which Pico checks to calculate the location of the planets. I used two other main components: a Waveshare Precision RTC expansion module with an embedded DS3231 chip and a Pimoroni Pico Display Pack. This allows the device to calculate the position of the planets based on the current time and date. Once calculated, the device immediately shows the planets and their relative circular orbits on the display. The best part is that no external data is required. The positions of the planets are calculated on-board, and the only thing the system knows is the current time coming from the RTC module. Instead of relying on the RP2040’s internal clock, the model uses an external DS3231 real-time clock, which once set up can be maintained with an optional battery. The current date can be set using the buttons on the dial.
Of course, what’s a development process without challenges! One of the surprises was that the default library did not have a function for drawing a circle – I had to implement it myself. In addition, given that I created all the planets pixel by pixel on the tablet myself, I needed to have access to this data on the microcontroller. I decided to wrap everything in code by converting images to bytes. This way, I managed to keep the array as a const, and MicroPython optimized the process and speeded up the work with the data.
Tips to make your work easier
As you can see, building a similar device is relatively easy in three steps:
- Assemble the components using the sandwich principle. To do this, you will need a Raspberry Pi Pico, Precision RTC DS3231, Pico Display Pack, Pico Header Pack.
- Download the code and configure the RTC.
- Print the case on a 3D printer.
To further simplify the technical implementation for everyone who wants to try their hand at it, I have posted the source code on GitHub.
The project can be developed and transformed: from adding other celestial bodies, monitoring sunrise and sunset, to using batteries for power and switching to an e-ink screen. For example, I used this device as the basis for another project, the Raspberry Pi Based Sun Tracker, which I will discuss in the following articles.