Dmytro Panin works as a Delivery Director at Levi9, an IT company. He has always been fascinated by astronomy and wanted to have a gadget that would show how the planets of the solar system move in real time. That’s how Dmytro came up with the idea of creating a pocket planetarium based on the Raspberry Pi Pico microcontroller, describing his experience on the DOU forum. Here’s how you can make the device at home.
Step 1
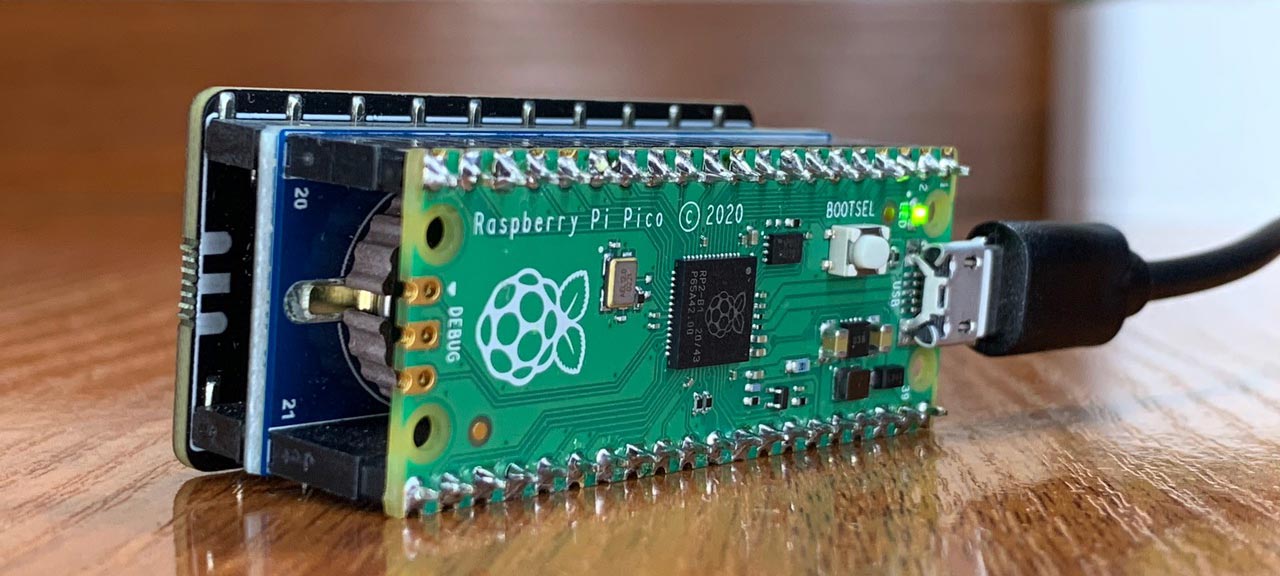
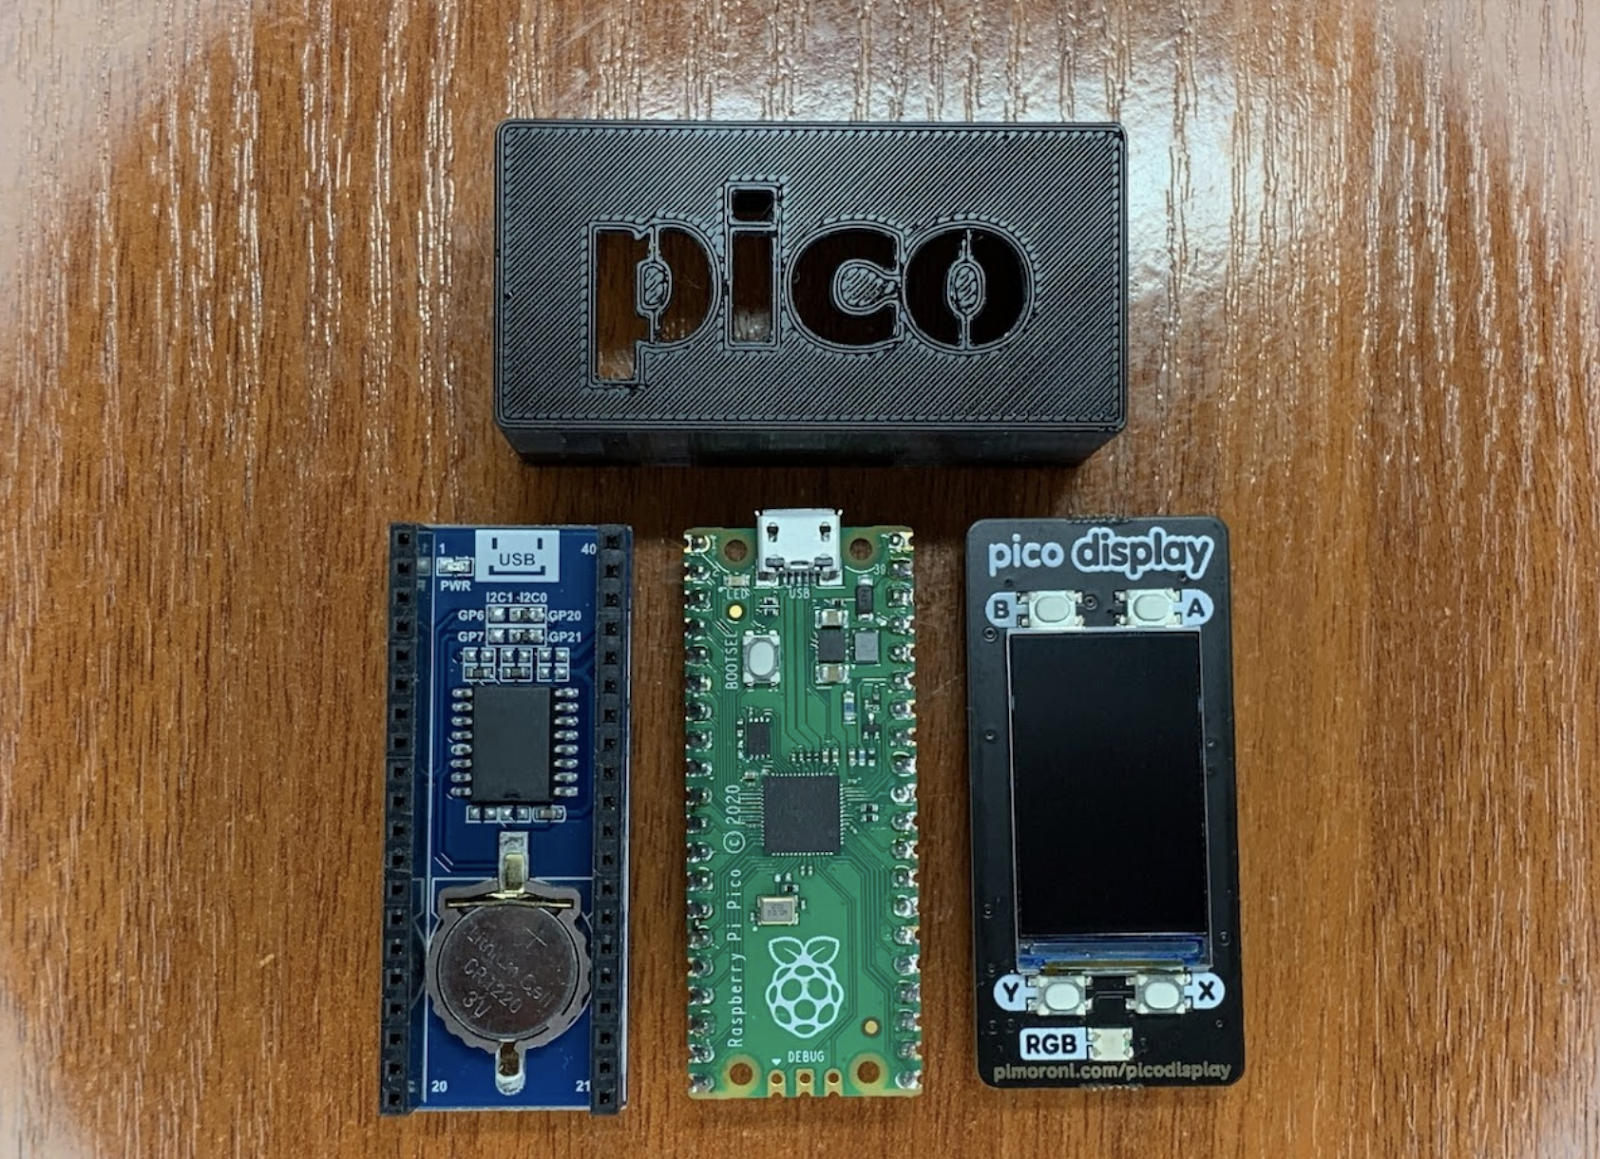
You need a budget board with a powerful microcontroller. Dmytro chose a Raspberry Pi Pico, specifically the RP2040. This is a kind of small computer with a small amount of memory and limited possibilities for connecting additional gadgets.
Step 2
Next, you need to choose a programming language. For controllers, this is usually C. The IT guy used MicroPython, a limited version of Python for microcontrollers that makes programming faster, easier, and even more cross-platform. It is important to understand that it does not allow memory control and uses many more resources for the interpreter.
Step 3
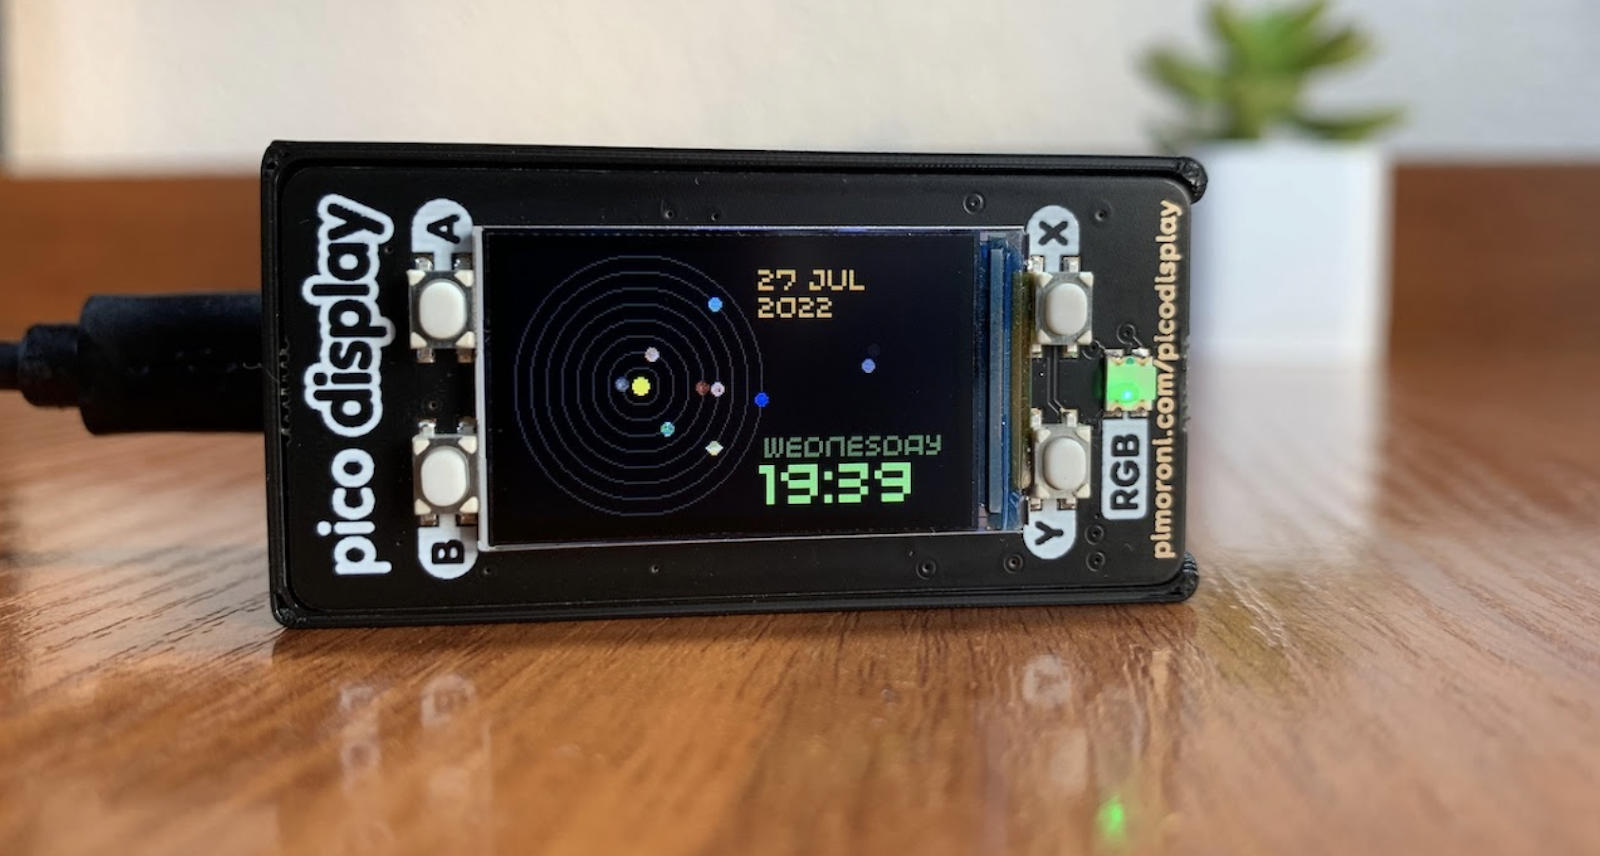
After that, you should choose the RTC module (what shows the real time in the clock – ed.), which Pico checks to calculate the location of the planets. Dmytro used two other main components: a Waveshare Precision RTC expansion module with an embedded DS3231 chip and a Pimoroni Pico Display Pack. This allows the device to calculate the position of the planets based on the current time and date.
Step 4
Once the calculations are complete, the device immediately shows the planets and their relative circular orbits on the display. No external data is required. The positions of the planets are calculated on board, and the only thing the system knows is the current time coming from the RTC module.
Step 5
One of the final stages is to “create planets”. Dmytro did this pixel by pixel on a tablet. To do this, he needed to have access to the relevant data on the microcontroller. So he decided to “wrap” everything in code by converting pictures into bytes. This way, he managed to keep the array as a const, and MicroPython optimised the process and speeded up the work with the data. And the last step was to print the case on a 3D printer.
NOTE: To simplify the technical implementation for everyone, the IT specialist posted the project source code on GitHub.